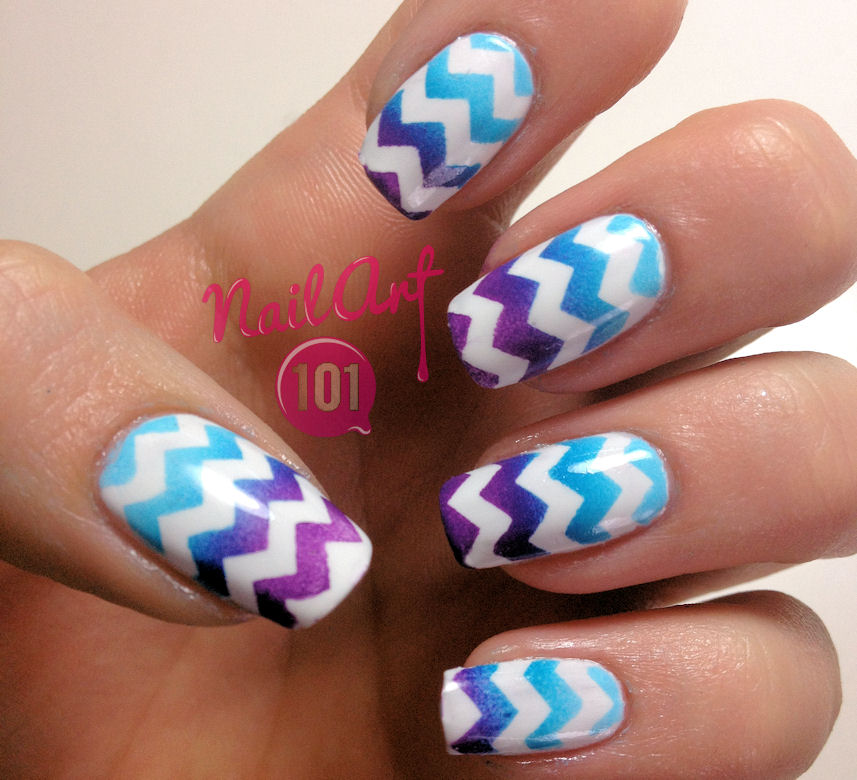
This chevron nails tutorial is much easier than the final look suggests! It's all thanks to this lovely new product, Nail Vinyls! I'd seen so many pictures on instagram of flawless chevrons and when I discovered it was because of these handy pre-cut stickers I promptly placed my order. If you're not an online shopping fan, you can still have chevron nails by free handing it or using scotch tape and zig zag craft scissors. What I like about the nail vinyls is they're thicker and heavier than scotch tape, so I found them much easier to control. I've spent too many hours fighting with scotch tape and calling it bad words!
In this tutorial I used Outdoor Girl in Blue, NYC in Water Street Blue, American Apparel in African Violet and Sally Hansen Extreme Wear in White On, Seche Vite top coat and OPI Nail Envy base coat. I used the full size Nail Vinyls Chevron stickers, but they have a mini version too!
tips & tricks
Still have some questions? Send me an email and I'll talk you through any problems you're having. Don't forget to email me a photo of your chevron so I can see your beautiful work!
No comments:
Post a Comment