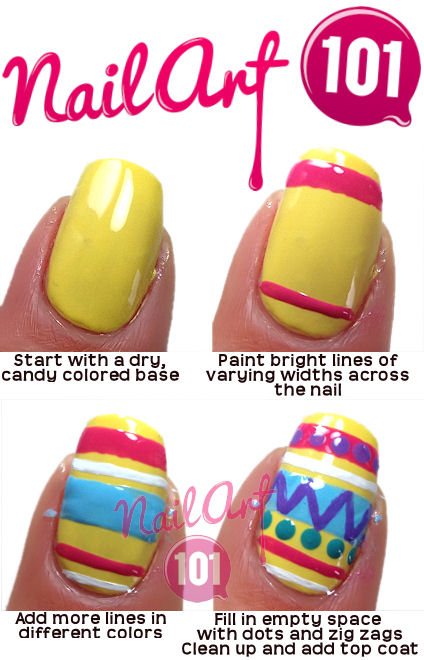
Instead of painting Easter eggs this year, why not try this Easter nails tutorial instead? This tutorial is inspired by the patterns and designs you usually see on Easter eggs, but this way you get to show off your painting skills everywhere you go! It's a cute, candy colored win win situation!
In this tutorial I used Outdoor Girl in Blue, L'Oreal in Royalty Reinvented and Not A Cloud in Sight, NYC in Lexington Yellow, Essie in Mod Squad, Seche Vite top coat and OPI Nail Envy base coat.
tips & tricks
Make sure you take the time to let your polish dry before you start painting on top of it. Nobody likes bleeding colors! Paint your lines, then switch to working on a different nail while the first one dries.
Painting straight lines is hard, but just take a deep breath and sweep it across your nail. If you mess up, correct it with a bt of your base color.
I used a few different brushes and dotting tools to do this manicure. Read my supply guide to find out more about nail art tools.
If you're feeling stumped for design patterns, check out pinterest. I pinned a few cute Easter designs and used those as my inspiration.
Draw out the designs on paper before you start painting. It can really help you visualize what you're going to paint.
Still have some questions? Send me an email and I'll talk you through any problems you're having. Don't forget to email me a photo of your easter nails so I can see your beautiful work!

No comments:
Post a Comment